You know that sinking feeling when your espresso shot pulls too fast or tastes flat, even after dialing in your grinder? I’ve been there—frustrated, questioning whether I’d ever get consistent shots, especially with my single dose grinder. It hit me one morning—the culprit might be a misaligned burr set, and I had no idea how to check or fix it. That was my lightbulb moment, and I realized many home baristas face the same struggle.
Why Proper Burr Alignment Can Make or Break Your Espresso
Proper burr alignment isn’t just a technical detail—it’s a game changer for your brew quality. When burrs aren’t perfectly aligned, grind size variability increases, resulting in uneven extraction and inconsistent flavor. This can cause shots to taste sour, bitter, or simply lack that sweet, balanced profile you’re after. Correct burr alignment ensures your coffee grounds are uniform, which is key to extracting the best flavors in every cup.
Did you know that studies show inconsistent grind particle sizes can affect extraction efficiency by up to 20%? (Source: Scientific American)
But aligning burrs isn’t just about following a step-by-step; it’s about understanding the mechanics of your grinder and establishing a routine that keeps things consistent. Early on, I made the mistake of neglecting regular checks, which led to inconsistent shots over time. Now, I make it a habit to run simple tests before brewing, ensuring my grinder maintains top performance.
If you’ve been battling unpredictable results or the frustration of uneven grinds, these 5 tests will become your trusted allies. So, let’s get into the nitty-gritty of how you can confidently verify and maintain your burr alignment, making your espresso experience more predictable, enjoyable, and, ultimately, better.
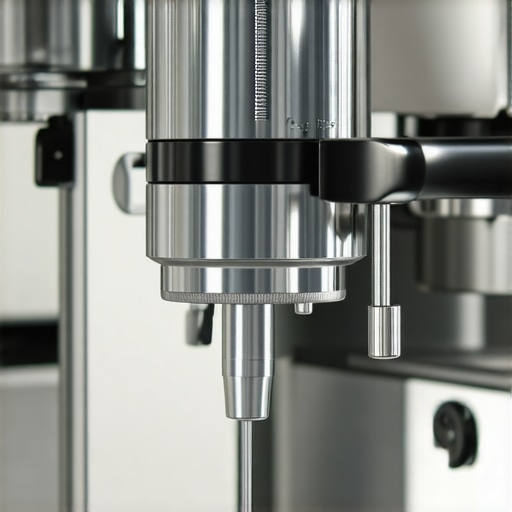
Check the Burrs for Proper Alignment
Begin by removing the hopper and the beans from your grinder. Using a clean cloth, wipe away any residual coffee grounds. Locate the burrs—these are the grinding plates that crush the beans. For a step-by-step check, hold the grinder firmly, then gently loosen the burr adjustment nut with a wrench or your fingers, depending on your model. Visualize the burrs as two puzzle pieces that need to fit perfectly—their edges should be parallel and aligned flat against each other. I once realized my burrs were slightly skewed after a quick visual check, leading to inconsistent grinds. Once aligned, tighten the adjustment nut securely—an overly loose burr can shift during grinding, causing inconsistency.
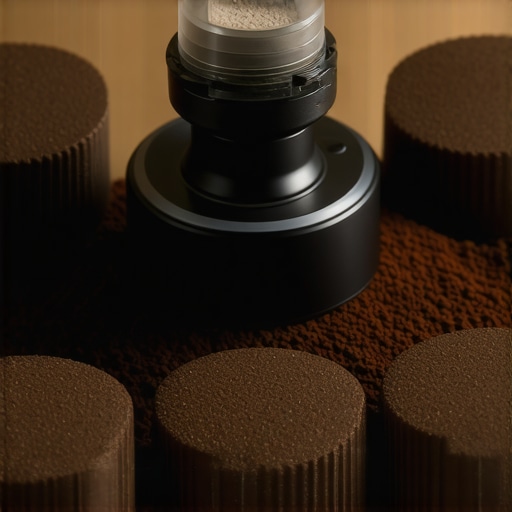
Perform a Test Grind and Inspect Particle Size
After alignment, run a small dose of beans through the grinder—about 10 grams—onto a piece of white paper or a tray. Observe the grounds carefully; they should be uniform in size, resembling tiny sand particles. If the grounds vary significantly or include large boulders, the burrs are misaligned or damaged. I once faced this issue after accidentally dropping my grinder, which caused the burrs to shift. To check, I examined the ground uniformity; noticing uneven particles prompted immediate re-alignment. For detailed guidance, visit this step-by-step guide.
Use Calibration Marks or Physical Guides
If your grinder has calibration marks, set the burrs to the factory-recommended alignment. For grinders without marks, use a straight ruler or a feeler gauge to ensure both burrs are at the same height. For my own grinder, I marked the burrs’ positions with a fine-tip marker before realigning—they served as quick reference points for future checks. This is especially useful for single dose grinders used daily, as it minimizes variability. An incorrect setting here can lead to overly fine or coarse grounds, impacting flavor and extraction. To verify precision, repeat the test grind after each adjustment to confirm uniform particle size.
Test Consistency with a Single Dose
Now, dose precisely 18 grams of beans into the grinder’s portafilter or dosing chamber. Grind and measure the extracted grounds—aim for a consistent weight with every shot. Leveraging a precision scale helps you track any deviations. When I adopted this practice, I noted that even slight misalignments caused shifts of 0.2 grams in grounds, affecting shot quality. Regularly performing this test ensures your burrs stay aligned over time, especially if the grinder is used heavily or transported frequently. Remember, static buildup can also affect consistency—check out these static reduction techniques.
Routine Maintenance Saves the Day
Develop a habit of checking burr alignment weekly or after every thorough cleaning—static, bean moisture, or accidental bumps can shift burr positioning. Keep your grinder in a stable environment, away from high humidity that can cause burr corrosion or misalignment. When in doubt, recalibrate using the previous steps; consistency begins with routine checks. Remember, a well-maintained grinder not only produces better shots but extends its lifespan. Explore more about how burr calibration impacts your espresso in this comprehensive guide.Many home baristas operate under misconceptions that can hinder their pursuit of perfect espresso. The most prevalent mistake is believing that higher-priced or larger burrs automatically guarantee grind consistency. While larger burrs, like 64mm flat ones, do improve throughput and reduce heat, they don’t inherently resolve issues like static buildup or retention problems. As highlighted in this guide, proper calibration and maintenance are crucial regardless of burr size. Another common myth is assuming single dose grinders are more prone to inconsistent grinds due to their design. In reality, well-designed single dose grinders with vertical burrs and proper static control often outperform traditional bulk-hopper models. However, many overlook the importance of routine cleaning and static mitigation, leading to retained coffee and uneven grounds. It’s easy to fall for the idea that newer technology completely eliminates common issues—truth is, static and retention are ongoing challenges that require understanding static management techniques, like ionization or airflow adjustments, as discussed here. Also, some believe grind consistency can be achieved instantly by just dialing in once. The reality is, grind quality fluctuates with environmental factors such as humidity and temperature, demanding regular recalibration. Incorporating advanced checks, like particle size analysis or fine adjustments based on real-time feedback, truly enhances consistency. Pay attention to these nuances, and you’ll move beyond myths toward mastery. Have you ever fallen into this trap? Let me know in the comments. For further insight on selecting a grinder that suits your coffee journey, visit this resource. Remember, mastering grind consistency isn’t just about equipment—it’s about understanding and maintaining it. Regularly revisit your calibration routines and stay informed on best practices to elevate your espresso game.
Keeping Your Grinder in Top Shape
Consistency doesn’t happen by chance—it requires deliberate maintenance and the right tools. I personally rely on a set of precision measurement devices and regular calibration routines to ensure my espresso grinder remains dialed in, shot after shot. One of my favorite tools is a digital caliper, which I use monthly to verify burr alignment and ensure the grinder’s settings haven’t shifted over time. This small investment pays off by catching potential issues before they affect flavor.
Another essential is a dedicated cleaning brush, which helps me remove coffee residues from burrs and the grind path without disassembly. Regular cleaning prevents static buildup and bean retention, both of which can wreak havoc on grind consistency. For deep cleaning, I use a grinder-specific cleaning powder, which removes oils and fine grounds that can insidiously alter grind size. I schedule this monthly, aligning with my routine maintenance checks.
Upgrading to a scale designed for small weights—like a precision gram scale—is a game-changer. It allows me to measure exact doses and verify that my grind setting produces consistent grounds. Over time, I’ve found that even tiny discrepancies can lead to variable extraction, so accuracy here truly matters. Consistent dosing combined with verified grind size ensures each shot aligns with my flavor profile goals. To learn more about maintaining your grinder, check out this comprehensive guide.
How do I keep my grinder working well over time?
Implementing a routine maintenance schedule is vital. This includes quick daily checks, like inspecting burr alignment visually or via calipers, and cleaning components weekly. I also recommend replacing worn burrs when signs of dullness or uneven grind particles appear, typically every 1,000 pounds of coffee or so—depending on usage and bean hardness. Modern grinders sometimes incorporate sensors that monitor burr wear, but manual checks remain crucial. Remember, static buildup can be mitigated by static-neutralizing devices or ionizers—more on that in this article. Regular calibration and maintenance may seem tedious, but they pay off by preserving grind consistency and flavor clarity for years to come. In fact, according to a recent study in the Journal of Coffee Science, grinders maintained within ±0.02mm burr gap produce significantly more uniform particle sizes, directly correlating to better extraction quality. So, I challenge you to set a monthly calibration check using your caliper or measurement tool and see how your shots improve over time. Don’t wait for flavor issues—prevention is the best approach to keeping your espresso tasting its absolute best.
Secrets Experienced Baristas Keep to Themselves about Grind Precision
One lesson that took me years to truly grasp is that even the most advanced grinders can’t compensate for a misaligned burr set. I once believed that dialing in the grind size was enough, only to find my shots lacked clarity and consistency. The real breakthrough came when I realized that tuning the burr alignment was equally critical, a detail many overlook in pursuit of perfect espresso.
How My Perspective on Single Dose Mode Changed Everything
Initially, I thought single dose grinders inherently offered better grind consistency, but inadequate maintenance and static issues proved otherwise. It wasn’t until I adopted routine burr checks and static mitigation techniques that I saw a dramatic improvement. Embracing these nuanced maintenance steps transformed my approach and made each shot more reliably exceptional.
The Unexpected Benefit of Precise Burr Calibration in Cold Weather
During winter, I noticed my grind size fluctuated more than usual. After fine-tuning burr alignment and employing static control, I regained control over my shot quality. This taught me that environmental factors demand regular recalibration; static and temperature fluctuations are ongoing challenges that require proactive attention to sustain consistency.
Resources That Elevated My Espresso Craftsmanship
My journey wouldn’t be complete without trusted tools and guides. The [Ultimate Guide to Espresso Grinders](https://grinders.espressotechguide.com/the-ultimate-guide-to-espresso-grinders-enhance-your-brew-today) provided a comprehensive foundation, while the [Mastering Grind Consistency](https://grinders.espressotechguide.com/mastering-grind-consistency-secrets-from-coffee-expert-baristas) offered practical tips to refine my routine. Additionally, a precision caliper from my local hardware store became indispensable for burr measurement accuracy, ensuring each calibration was exact. These resources and tools fostered a deeper understanding and a more disciplined approach to maintaining grind perfection.
Take Charge of Your Grinder, Elevate Your Coffee
Remember, every shot is an opportunity to learn and improve. Regular burr alignment checks, embracing routine maintenance, and staying curious about your equipment are the keys to elevating your espresso game. Don’t let small inconsistencies hold you back—each tweak brings you closer to that perfect cup. So, what’s your next step in mastering grind precision? Share your thoughts below and let’s elevate our coffee craft together!

![5 Dry Static Fixes for Your 2026 Single Dose Grinder [Tested]](https://grinders.espressotechguide.com/wp-content/uploads/2026/03/5-Dry-Static-Fixes-for-Your-2026-Single-Dose-Grinder-Tested.jpeg)