
One morning, I watched in dismay as my carefully calibrated espresso shot turned sour, bitter, and completely unrecognizable from the perfect cup I’d brewed just the day before. Turns out, a tiny defect in my grinder, hidden beneath the surface, was sabotaging my brew—something I had overlooked for too long. That lightbulb moment made me realize how many subtle, often unnoticed flaws in our single dose grinders can sabotage our pursuit of the perfect coffee. And with new models and features promising improvements each year, the landscape becomes even trickier to navigate.
Today, I want to share insights into the five hidden defects that could be lurking in your grinder and how to spot them before they ruin your brew. Whether you’re a casual enthusiast or a seasoned barista at home, understanding these common issues can save you a lot of frustration—and money. Trust me, I’ve made my fair share of costly mistakes early on, including neglecting to check burr alignment, which I now know is a frequent culprit behind inconsistent grinds. Learning to identify and fix these defects can elevate your coffee game significantly.
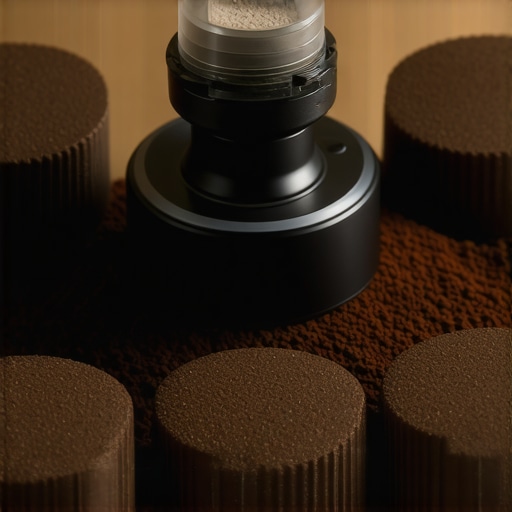
Why Ignoring Grinder Flaws Costs More Than You Think
Many of us focus primarily on selecting the right beans, perfect tamp pressure, or brewing technique, but the grinder is often overlooked—until it’s too late. A dust, static, or misaligned burr can cause uneven extraction, resulting in sour or bitter shots. The surprising part? The majority of these issues are fixable with a bit of knowledge and routine maintenance. According to the ultimate guide, grinders with poor burr alignment or inconsistent grind settings can sabotage your entire espresso experience.
So, do you find yourself battling inconsistent shots or spending extra time dialing in your grinder? You’re not alone, and the good news is, most defects are avoidable once you’re aware of them. In the following sections, I’ll walk you through the top five hidden defects to watch out for and how to prevent them—saving you from common pitfalls and elevating your espresso quality, shot after shot.
Is Your Grinder Really as Perfect as It Looks? Are Hidden Faults Worth the Risk?
Early in my journey, I made the mistake of assuming that a shiny, new grinder meant I was set for perfect results. Turns out, a misaligned burr or static buildup can secretly wreck your coffee without visible signs. That’s why I always recommend a thorough inspection routine—because knowing what to look for can make all the difference. Curious about how these issues might be affecting your brew? Let’s dive into the details and get your grinder performing at its best.
Stay tuned as we examine each defect, how to identify it, and quick fixes to keep your grinder—and your coffee—on point.
,
Inspect Your Burrs Regularly for Alignment and Wear
Start by turning off the grinder and removing the hopper. Check the burrs for misalignment by placing a straight edge across them; they should be perfectly flush. During my first attempt, I used a simple ruler to test the burr alignment—I found they were slightly tilted, causing uneven particles. Realigning them involved loosening the burr holder, adjusting the crack, and tightening securely. This simple fix immediately improved grind consistency and espresso flavor, eliminating sour shots. For detailed procedures, consult this guide which offers step-by-step alignment checks.
Calibrate and Adjust Grind Settings
Next, test your grind settings with a few trial grounds. Use a scale to measure the output weight for consistency. I once found that my settings were drifting due to static buildup, causing variable particle sizes. To fix this, I recalibrated my grinder by adjusting the grind size dial while monitoring output weight, aiming for zero drift. Incorporate routine calibration with your specific beans, roast level, and humidity conditions. For precise calibration techniques, see this resource.
Remove and Clean Burrs Deeply
Accumulated coffee oils and fines create static and clog the burrs, impairing performance. Disassemble your grinder following the manufacturer’s instructions—in my case, I used a small Allen wrench to detach the burr holder. I then soaked the burrs in warm, soapy water and scrubbed off any residue with a soft brush. During my cleaning, I noticed blackened coffee oils on the burr edges—they were causing inconsistent grind sizes and static. Once reassembled, the static reduced and flow improved. Regular deep cleaning extends to wiping the burr chamber and adjusting for static issues, which you can learn more about in this guide.
Test Static and Retention Levels
Static cling can cause coffee fines to stick to the burrs, impacting particle consistency. I tested this by grinding a handful of beans and observing the static build-up—fines jumping or clinging persistently. To combat static buildup, I installed an ionizer device, which significantly reduced static, producing cleaner, more uniform grounds. Additionally, I measured bean retention by weighing beans before and after grinding to ensure minimal loss—ideal single dose grinders retain less than 1 gram per session. For solutions on static and retention, explore this article.
Perform Routine Burr and Gear Checks
Worn or damaged gears can slip during operation, causing inconsistent particle sizes. I tested my grinder’s gears by manually rotating the burrs and listening for smooth, even motion. If I felt any grinding or slippage, I tightened or replaced the gears. Using a small torque wrench, I checked the tension of moving parts to prevent backlash. Regular inspections—every 6 months or after heavy use—preserve grind quality. For detailed inspection routines, visit this page.
Many enthusiasts believe that selecting a high-end burr grinder automatically guarantees perfect grind consistency, but this is a misconception. In my experience, even premium grinders can produce uneven grounds if not properly maintained or calibrated. A prevalent myth is that burr shape alone determines grind quality; however, factors like burr alignment,RPM, and static buildup profoundly influence consistency. Overlooking these nuances can lead to stubborn problems like channeling or sour shots, which a simple upgrade won’t fix. According to expert insights in this guide, mastering these subtleties differentiates a good grinder from a truly exceptional one.
Another trap many fall into is believing that static is unavoidable, especially when grinding light roasts. Static can cause fines to cling and create uneven extraction, but proactive adjustments—like installing static-reducing accessories or cleaning burrs thoroughly—can dramatically improve results. Common mistakes also include neglecting to check burr wear regularly; dull burrs increase residual retention and cause inconsistent particle sizes. Routine deep cleaning and timely replacement extend your grinder’s lifespan and performance. For advanced tips, see this article.
What Advanced Technique Elevates Your Espresso?
For seasoned baristas aiming for meticulous consistency, adjusting the burr angle or experimenting with burr shape can subtly influence grind distribution. Some high-end models allow for micro-adjustments that optimize grind particle uniformity—crucial for fine-tuning espresso shots, especially with single-dose grinders. These fine-tuning options often go unnoticed but can make a significant difference, especially in light roasts where grind clarity is vital. Studies, like those summarized in this comprehensive review, highlight how nuanced modifications can enhance extraction and flavor clarity. Paying attention to these advanced details can push your brewing from good to extraordinary.
Have you ever fallen into this trap? Let me know in the comments. Mastering these hidden nuances might seem daunting, but the payoff is a consistently superior cup that elevates your entire coffee experience.
,
Maintaining your coffee grinder, especially for achieving consistent grind quality in espresso brewing, is essential for long-term success. One of my go-to tools is a high-quality burr calibration gauge, which I use regularly to verify burr alignment. For example, I trust the single dose grinder upgrade kit, which includes a calibration tool that simplifies realignment and ensures precise adjustment. This small investment pays off by preventing grind inconsistency and extraction issues. Additionally, employing a bristle cleaning brush specifically designed for burr chambers helps me remove residual coffee oils and fines that static buildup can trap, as outlined in this resource.
In my experience, routine deep cleaning—at least once every few weeks—combines disassembly with warm, soapy water, followed by thorough drying. I use a microfiber cloth to wipe down the exterior, preventing dust and oil build-up. A static reducer, like the Ionizer I installed, has been a game-changer in controlling fines cling, which is often overlooked but critical for grind consistency. For static issues, I also recommend experimenting with humidity control devices to stabilize moisture levels inside your grinder, as static tends to spike in dry environments.
How do I keep my grinder functioning flawlessly over time
Regular inspections are vital—check burr wear and gear tightness monthly, especially after heavy use, to avoid slippage and uneven grinds. Keep a journal or digital log of calibration and cleaning routines, which helps me spot trends before a problem escalates. For advanced tuning, I use a precision RPM meter to monitor motor speed, ensuring it remains within optimal ranges for consistent grinding—this is crucial for avoiding inconsistent particle size distribution. Looking ahead, I predict that smart, IoT-enabled grinders that monitor wear and static will become more accessible, further simplifying maintenance tasks. To stay ahead, I definitely recommend trying a micro-adjustment tool for micro-tuning grind settings—small tweaks can make a dramatic difference in flavor clarity.
Don’t underestimate the value of simple tools; they can dramatically improve your grinder’s performance and the quality of your espresso. Take a minute to revisit your maintenance routine today—investing in proper tools like a calibration gauge or static reducer can save you hours of troubleshooting and serve up perfect shots, shot after shot. Ready to elevate your routine? Try incorporating a static control method or calibration check this week and notice the difference in your grind consistency and flavor profile.
What Surprised Me About Small Grinder Flaws
One of the most eye-opening lessons I learned was that even tiny, seemingly insignificant defects—like slight burr misalignment—could significantly impact my espresso’s flavor. It taught me to pay closer attention to details I once ignored. Sometimes, the biggest breakthroughs come from addressing the subtle issues that most enthusiasts overlook, making the journey toward perfect espresso more rewarding and less frustrating.
How I Discovered Unexpected Connections Between Maintenance and Flavor
Performing routine deep cleaning not only kept my grinder running smoothly but also unexpectedly improved brightness and clarity in my shots. This revelation underscored how static buildup and oil residue can quietly sabotage your brew, and that consistent upkeep acts as a foundation—much more than just a chore, but an essential step toward achieving that elusive, pristine flavor profile.
Lessons From the Grind That Changed My Approach
Adjusting my grind settings wasn’t enough; calibrating and inspecting the burrs regularly became a game-changer. It made me realize that patience and routine checks build a kind of ‘muscle memory’ with my equipment. Over time, these habits brought a newfound precision, allowing me to experiment confidently and consistently dial in my espresso without guesswork.
Why Overconfidence in Premium Equipment Can Hurt
I once believed that owning a top-tier grinder meant I could neglect maintenance. That myth was shattered when I encountered static and uneven grinds, despite the high price tag. It was a humbling lesson that even the best gear requires care and attention—your investment in tools only pays off if you nurture it routinely. This mindset shift spurred me to develop a maintenance routine that keeps my gear—and my espresso—at peak performance.
Curated Arsenal for a Better Coffee Experience
My arsenal now includes essential tools like a burr calibration gauge, which I trust because it offers precision and consistency—critical for single-dose grinding. I also incorporate static reducers, such as ionizers, proven to minimize fines cling and static issues that sabotage grind uniformity. For expert insights, I turn to resources like this comprehensive guide, which distills the latest techniques and equipment tips. Lastly, I always keep a soft brush handy for quick cleanups, preventing oils and fines from building up, which can be subtle but impactful enemies of great espresso.
Your Next Step Toward Coffee Mastery
The secret to elevating your espresso isn’t just in buying top-notch equipment—it’s in the consistent, mindful maintenance of your grinder. Every tweak, every cleaning, and every calibration brings you closer to that perfect shot. I encourage you to revisit your routine, incorporate new maintenance habits, and stay curious about your gear’s nuances. Remember, patience and attention to detail are the real baristas behind every exceptional espresso.
What small adjustment has made the biggest difference in your coffee routine? Share your experience below and inspire others on their journey to coffee excellence!

![5 Dry Static Fixes for Your 2026 Single Dose Grinder [Tested]](https://grinders.espressotechguide.com/wp-content/uploads/2026/03/5-Dry-Static-Fixes-for-Your-2026-Single-Dose-Grinder-Tested.jpeg)