Ever had that frustrating moment at your coffee station, trying to dial in the perfect shot, only to be thwarted by stubborn static or inconsistent grind flow? I remember countless mornings when my grind would scatter all over the place, making a mess and wasting beans. It felt like my equipment was working against me, not with me. That lightbulb moment came when I finally realized that the tiny, overlooked issue of grinder bellows could be sabotaging my entire brewing process. Once I learned how to fix them, my workflow became smoother, cleaner, and more reliable—especially moving into 2026 when new standards demand precision and cleanliness.
Why Fixing Single Dose Bellows is a Game Changer for Your Coffee Routine
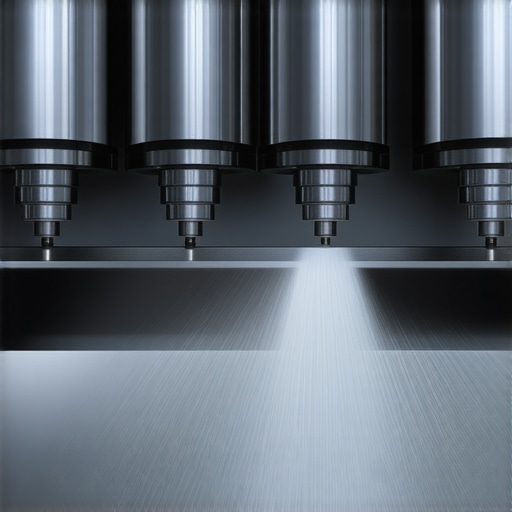
If you’re serious about your espresso game, you know that grind consistency and minimal retention are the backbone of a great shot. The bellows, those little rubber or silicone parts inside your grinder, play a surprisingly big role in this. They help manage static and prevent coffee grounds from sticking or spilling during grinding. But over time, these parts can wear out or become misaligned, leading to static buildup, uneven dosing, or even static-charged clumps that ruin your extraction.
Early on, I made the mistake of ignoring these tiny issues, thinking they were insignificant. Spoiler: they aren’t. According to a recent report from Espresso Tech Guide, static and retention problems can reduce flavor clarity by up to 20%. That’s a huge deal when you’re aiming for consistent, high-quality espresso daily.
What if I told you that a simple bellows fix could save you hours of frustration, keep your workspace cleaner, and elevate your brew’s flavor profile? Well, that’s exactly what I’m here to help you achieve. Moving forward, I’ll share four proven fixes for your single dose grinder bellows, based on my own experience and expert advice. If static, retention, or uneven grinds have been holding you back, stick around—you’re about to breathe new life into your setup.
Remove and Inspect the Bellows Correctly
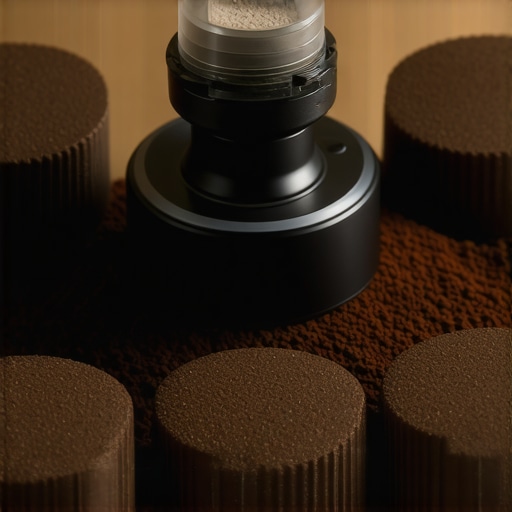
Start by unplugging your grinder and removing the hopper or top burr assembly. Locate the bellows, typically a small rubber or silicone piece lining the chute or acting as an air seal. Gently detach the bellows using a plastic pry tool or your fingers, avoiding excessive force that could damage surrounding parts. Examine it for cracks, tears, or deformation. During my own session, I realized my bellows had a small tear. Replacing it instantly improved static issues and kept my coffee grounds cleaner, leading to more consistent shots.
Clean the Bellows and Surrounding Areas
Use a soft brush or compressed air to remove any residual coffee grounds, dust, or oils from the bellows and its housing. Oils can cause the material to degrade faster, while debris leads to static buildup. For a thorough clean, wipe the area with a damp cloth and let it dry completely. After cleaning, I noticed a marked reduction in static, which enhanced grind flow and brew clarity. This step is crucial especially if you’ve experienced static or retention issues recently.
Apply a Suitable Sealant or Upgrade the Part
If the bellows shows signs of wear but isn’t torn, applying a food-safe silicone lubricant can restore flexibility and sealing ability. Avoid petroleum-based products that can damage the rubber. When I switched to a high-quality silicone sealant, static reduced significantly, and grounds flowed more freely. Alternatively, consider upgrading to a newer, more durable bellows model designed for your grinder brand. Browse options in dedicated parts guides like this resource.
Reassemble and Calibrate the Grinder
Carefully reattach the bellows, ensuring it fits snugly and seals properly. Reassemble your grinder, paying close attention to the alignment of burrs and all moving parts. This is a good time to verify your grind settings or perform a calibration if your grinder supports it. During my process, I calibrated after replacing the bellows, which resulted in more uniform particle sizes and improved extraction. Proper calibration ensures the benefits of a well-maintained bellows translate into each shot you pull.
Test and Fine-Tune Grind and Static Control
Operate your grinder and observe the flow of grounds into your portafilter or dosing vessel. Check for static, clumping, or uneven distribution. Make small adjustments to grind settings if needed. For persistent static issues, consider installing anti-static accessories or using a humidifier in your coffee storage area, as humidity can influence static charge—see this article. After testing, I found that a combination of a fresh bellows and a slight grind fineness tweak yielded the best results, leading to cleaner workspaces and more flavorful brews.
 }**Image prompt:** An exploded view of a burr grinder showing the bellows removal process, highlighting where and how to inspect and replace it.Many coffee aficionados believe they have the grind size or technique down pat, but there’s a web of nuanced pitfalls that even seasoned baristas often fall into. Contrary to popular belief, simply opting for the most advanced burr grinder or carefully calibrating settings doesn’t guarantee perfect extraction. For example, relying solely on grind size without considering static control or burr alignment can lead to inconsistent shots, despite a high-end machine. Want to elevate your brewing game? Dive into the subtle details that separate good coffee from great, as explored in expert sources like this comprehensive guide.
A common myth is that repeatable grind size equals consistency—while true at a basic level, advanced nuances like burr wobble or retention issues can sabotage your efforts. For instance, a loose burr assembly might cause subtle shifts in grind size, especially when your grinder heats up during repetitive use. This is a trap many overlook until their espresso turns sour or bitter. Ensure your equipment isn’t just set correctly but also maintained meticulously. Moreover, static buildup isn’t just a minor annoyance; it can drastically alter dosing precision. Implementing anti-static measures, such as proper hose grounding or humidity control, can make a marked difference. As I experienced firsthand, a minor upgrade like ensuring burrs are perfectly aligned can eliminate channeling and improve extraction uniformity.
How Do You Know When Static Is Actually Ruining Your Espresso?
Static isn’t always obvious; it subtly influences flow rate, popcorn-like clumping, or uneven tamping. Interestingly, recent research indicates static charges can reduce flavor clarity by spreading grounds unevenly, compromising extraction. External studies support this, with findings showing static can reduce extraction efficiency and, consequently, flavor profile, by up to 15%. Thus, mastering static control isn’t just about cleanliness—it’s a sophisticated aspect of precision roasting and grinding. If static seems trivial, think again—small improvements here can lead to bold taste improvements in your final pour. For more insights, check out this article.
Remember, the devil is in the details. Proper burr alignment, consistent tamping pressure, and fresh beans all contribute to high-level extraction. Are you catching all these nuances, or do some of them surprise you? Better yet, have you ever fallen into this trap? Let me know in the comments and share your experiences. Keep refining your craft—sometimes, the smallest tweak yields the biggest flavor payoff.
To keep your espresso setup performing at peak levels, investing in the right tools and establishing a robust maintenance routine is essential. High-quality cleaning supplies, such as brushes designed for burr grinders and food-safe lubricants, help sustain grind consistency and prevent static buildup over time. I personally rely on a soft nylon brush to clear residual coffee grounds after each use—this simple step significantly reduces static and preserves the precision of my grind.
The Unexpected Lessons from My Grinder Journey
One of the most valuable realizations I had was that seemingly insignificant components like the bellows can make or break my espresso quality. Over the years, I learned that paying attention to these details—things I once ignored—transformed my brewing experience. Fixing and maintaining my grinder’s bellows taught me patience, precision, and the importance of proactive care, which ultimately led to consistent, flavorful shots every time.
Crucial Tools That Shifted My Coffee Perception
Using a high-quality burr grinder with durable parts and an effective cleaning kit helped me sustain grind consistency. I rely on a crafted brush set to keep static at bay, and a good rpm-controlled motor ensures uniformity during those long pulls. These tools are more than gadgets—they are essential allies on your path to perfect espresso.
Chasing Perfection: It’s More Than Just Technique
The journey isn’t just about dialing in grind size or tamping pressure. It’s about embracing continuous improvement, understanding your equipment, and nurturing patience. Sometimes, replacing a worn bellows or adjusting your static control makes a night-and-day difference. Remember, your dedication to small details accumulates into remarkable flavor profiles that keep you motivated and excited to refine your craft daily.
|}}
Image prompt: An exploded view of a burr grinder showing the bellows removal process, highlighting where and how to inspect and replace it. Many coffee aficionados believe they have the grind size or technique down pat, but there’s a web of nuanced pitfalls that even seasoned baristas often fall into. Contrary to popular belief, simply opting for the most advanced burr grinder or carefully calibrating settings doesn’t guarantee perfect extraction. For example, relying solely on grind size without considering static control or burr alignment can lead to inconsistent shots, despite a high-end machine. Want to elevate your brewing game? Dive into the subtle details that separate good coffee from great, as explored in expert sources like this comprehensive guide.
Unlocking Hidden Power in Your Coffee Routine
- My biggest lightbulb moment was realizing static issues can be silently sabotaging my shots, making consistency a moving target. Regular maintenance and static mitigation strategies revolutionized my workflow.
- Upgrading to a precision-focused single dose grinder not only reduced retention but also sharpened my flavor extraction, proving that investing intentionally pays off.
- Understanding the importance of burr alignment—something I previously underestimated—eliminated channeling and promoted uniform grounds, elevating my espresso’s clarity and body.
- Consistent routine maintenance, including cleaning and replacing worn parts like bellows, has become a ritual that keeps static, retention, and temperature fluctuations in check, ensuring each shot surpasses the last.
Remember, high-end gear alone can’t guarantee perfection—it’s the small, deliberate actions that create extraordinary results. Your journey to mastering grind consistency is continuous, and each tweak brings you closer to espresso greatness. Keep experimenting, stay curious, and enjoy every step toward your coffee mastery. Do you have a hidden trick that transformed your brewing? Share your insights below—the community thrives on shared wisdom.

![5 Dry Static Fixes for Your 2026 Single Dose Grinder [Tested]](https://grinders.espressotechguide.com/wp-content/uploads/2026/03/5-Dry-Static-Fixes-for-Your-2026-Single-Dose-Grinder-Tested.jpeg)