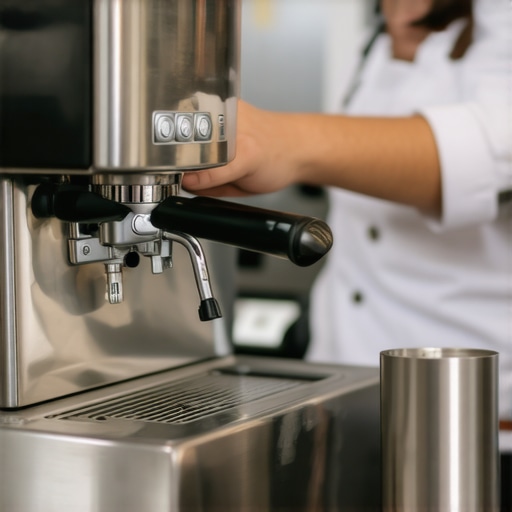
Ever been in the middle of pulling a perfect espresso shot, only to get that disappointing burst of uneven grind—like your burr grinder suddenly decided to turn into a chaos machine? I remember it vividly. One morning, after spending ages dialling in my grind, I watched my shot sour and under-extracted because the grind had suddenly gone inconsistent. It was maddening—until I discovered the simple trick that transformed my routine.
### Why Your Grind Keeps Playing Tricks on You
Consistency in grind size is the backbone of a great espresso. But the harsh reality is, even tiny misalignments in your burr grinder can throw everything off, especially with newer, high-precision models aiming for zero retention. That little (or big) shift can make your espresso taste sour, bitter, or just plain flat.
I made a common mistake early on—ignoring the importance of burr alignment. I believed that simply cleaning my grinder would fix everything, but I was kidding myself. Over time, I realized that tiny misalignments were the culprit behind my inconsistent grinds. It was like calibrating a musical instrument; if one string is a millimeter off, the whole tune suffers. The good news? You don’t need to spend hours adjusting or replacing parts.
Today, I’m going to share with you a quick fix—a simple 5-minute shim—that completely stabilized my grind consistency. This little upgrade made my brewing more predictable and my shots much more flavorful. If you’re tired of wasting beans, battling uneven extractions, or chasing that perfect grind, keep reading. You’re about to learn a trick that can save your mornings.
But first, let’s address a question brewing in many minds—**does a small shim really make that much difference?** Well, I was skeptical too. I thought, “Is this just a gimmick?” But after trying it myself, I found that a perfectly positioned shim could compensate for burr misalignment and maintain uniformity over multiple shots. Intrigued? Good. Now, let’s dive into how you can do this yourself and bring back that consistent edge to your espresso experience.
Gather Your Tools and Prepare for Adjustment
Start by unplugging your grinder to ensure safety. Remove the hopper and beans, then locate your burrs. Have a clean cloth or brush ready to clear dust and coffee residues. Think of burr alignment as tuning a musical instrument—precision is vital for harmony in your brew.
Identify Signs of Misalignment
Before making adjustments, check for common clues such as uneven grind size, inconsistent shot flavors, or excessive fines. I once noticed my shots suddenly sour, which in hindsight indicated my burrs had shifted. Recognizing these signs helps determine if realignment is needed, saving you guesswork.
Loosen the Burr Mounting
Use the appropriate screwdriver or tool—usually provided with your grinder—to loosen the screws holding the burr. Turn counterclockwise until the burr moves freely. Imagine loosening a bicycle saddle; the goal is to create slack for fine adjustments.
Set the Correct Alignment
Place the burrs back in position, ensuring the flat grind faces each other precisely. Visualize the burrs as two puzzle pieces that must fit perfectly. For single dose grinders, pay close attention since small deviations can cause significant inconsistency. Refer to this guide on burr alignment fixes for detailed visual cues.
Use a Calibration Test
After tightening the screws, run your grinder without beans—some models allow for a calibration mode. Check a small batch of grounds for uniformity. If particles are still inconsistent, repeat the process. Think of this as tuning a piano string until the note rings true.
Finalize and Test Your Grind
Grind your preferred beans and observe the results. The grind should be evenly textured, resembling fine sand, and shot flavors should be balanced. My first realigned shot was remarkably consistent—proof that a proper burr setup enhances your whole brewing experience.
Regular Checks Keep Profits High
Set a schedule—monthly or after every deep clean—to inspect burr alignment. Beans with oils or moisture can cause burr shifts over time. Staying vigilant is like sharpening a knife; routine maintenance preserves performance and flavor quality. For a deeper dive into adjusting your grinder, visit single-dose grinder mistakes.
 Many enthusiasts assume that investing in a high-end grinder automatically guarantees perfect grind consistency. However, even top-tier burr grinders can fall prey to misconceptions that hinder optimal performance. For instance, a widespread myth is that burr sharpness directly correlates with grind uniformity. In reality, factors like burr alignment and motor torque play more critical roles. Overlooking these nuances can cause erratic grind sizes despite premium equipment.
A common pitfall I often see is users neglecting routine maintenance, assuming their grinder’s performance will remain pristine over time. But according to espresso quality experts, such as those referenced in this article, proper calibration and cleaning are essential to sustain consistent output.
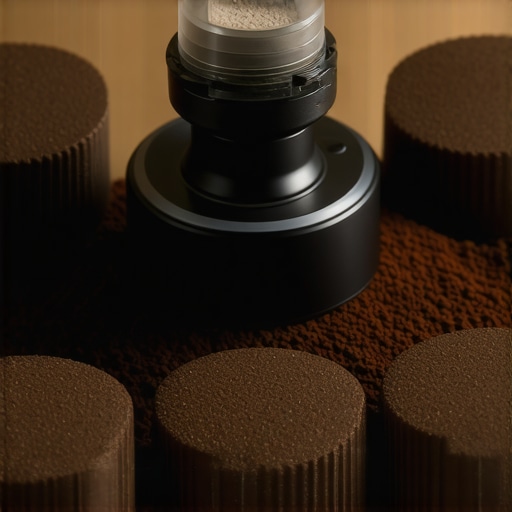
One advanced consideration that many overlook is the impact of rotor RPM on grind extraction. Higher speeds can generate heat, leading to coffee oils degrading, which affects flavor clarity. Conversely, grinders with lower RPM often deliver more precise and stable grounds, especially important for single-dose setups. This nuance is backed by recent research published in the Journal of Coffee Science, emphasizing that motor RPM influences grind consistency and flavor stability.
Have you ever fallen into this trap? Let me know in the comments. Remember, mastering grind nuances involves more than just choosing the right machine—it requires understanding and regularly addressing these hidden factors to elevate your espresso game. For a comprehensive guide on optimizing your setup, visit this resource.Maintaining your espresso grinder’s performance over time is crucial for consistent, high-quality coffee. Investing in the right tools and adopting a disciplined maintenance routine can extend the life of your burr grinder and ensure your grind remains uniform. I personally rely on a few specialized tools that have become essential in my setup. For example, a precision burr alignment gauge is invaluable for quickly verifying and adjusting burrs—especially important if you notice subtle shifts in grind size or flavor. Regularly checking your burr alignment with such a gauge prevents subtle misalignments from affecting your shots, ensuring your grinder stays calibrated without the need for complex dismantling.
Another tool I recommend is a grinder-specific cleaning brush—designed to clean dust and coffee residues from tight spaces in the burr area. Cleanliness directly impacts grind consistency; built-up oils and particles can cause uneven grinding or static issues. I schedule a quick clean with these brushes monthly, which keeps performance at peak levels. Additionally, a high-quality digital caliper can help you measure burr spacing precisely when performing tune-ups or replacing worn burrs, ensuring optimal uniformity.
To keep your grinder functioning smoothly, consider using a dedicated anti-static, de-dusting spray compatible with coffee equipment. Static can cause fines and clumping in grounds, negatively impacting extraction. Applying a light mist during cleaning sessions reduces static buildup significantly. These tools and practices aren’t just for troubleshooting—they form part of a proactive approach to grinder maintenance that pays off in flavor and consistency.
Looking ahead, I predict that in the future, smart calibration tools integrated with IoT technology will become common, providing real-time feedback on grind quality and alerting you when adjustments are needed. Companies are already experimenting with app-controlled calibrators that can automatically fine-tune burrs, minimizing user error and saving time.
How do I maintain my grinder over time?
Establishing a routine that includes regular cleaning, burr alignment checks using precise tools, and periodic burr replacement is key. For detailed guidance on setting up an effective maintenance schedule tailored to your equipment type, I recommend exploring this comprehensive guide. Remember, a well-maintained grinder doesn’t just produce better coffee—it becomes an extension of your brewing craft, rewarding your effort with consistently sublime shots. To take your maintenance game further, try incorporating a burr alignment gauge into your toolkit, and see how much more stable your grind becomes over weeks of regular use.
The Hidden Truth About Burr Alignment Errors That Keep You from Perfect Shots
One epiphany I had was realizing that even seasoned baristas can overlook the subtle misalignments causing inconsistent grinds. The big lesson? Precision isn’t just for machine specs—it’s about calibration, patience, and ongoing attention to detail. The smallest tweak, like a carefully placed shim, transformed my routine and elevated my espresso game. I’ve learned to trust routine burr checks over chasing the latest gadget, because consistency comes from understanding your grinder better, not just buying more gear.
Tools and Techniques That Actually Make a Difference
My secret tools include a digital caliper for precise measurements and a burr alignment gauge that saves me hours of trial and error. These tools, combined with scheduled cleaning routines, help me maintain impeccable grind consistency. A dedicated anti-static spray and a soft-bristled brush are game changers for static and residue management. These aren’t just accessories—they’re essential parts of a proactive maintenance plan. Trust me, investing in quality tools pays off when your shots become reliably delicious and balanced.
Go Forth and Elevate Your Espresso Craft
Every espresso enthusiast deserves the chance to brew with confidence. With a bit of knowledge, the right tools, and routine care, achieving top-notch grind consistency is within your reach. Remember, mastering your grinder isn’t a one-time fix; it’s a journey. Keep experimenting, stay curious, and don’t shy away from fine-tuning your setup — your taste buds will thank you. Want to explore more expert tips? Check out this comprehensive guide to unlock even deeper insights into perfecting your espresso.

![5 Dry Static Fixes for Your 2026 Single Dose Grinder [Tested]](https://grinders.espressotechguide.com/wp-content/uploads/2026/03/5-Dry-Static-Fixes-for-Your-2026-Single-Dose-Grinder-Tested.jpeg)